FAQs

Vidmar StaticGard cabinets and workstations have static-dissipative tops which are designed to ensure a static-safe work environment.

All single cabinets should be secured to the floor. Multiple cabinets need not be anchored, but should be bolted side-by-side or back-to-back using Vidmar model number CCH-1, Cabinet Connecting Hardware. (Every Vidmar cabinet has pre-punched holes in the sides and rear of the top flanges for through-bolting use).

Single cabinet anchoring:

  1. Anchoring is to be done using hardware model numbers CAK-1 (for anchoring to concrete floors) or CAK-2 (for anchoring to wood floors).
  2. Follow drilling and bolting instructions provided with each anchoring kit.

Note: For proper installation, cabinets should be shimmed to be level within 1/16" in each direction.

Cabinets equipped with pallet bases may easily be moved by fork lift or pallet jack.
  1. Caution must be taken to insure that forks of lift truck are fully inserted beneath the cabinet before lifting, in order to prevent accidental tipping due to an unbalanced load.
  2. Prior to moving, all drawers must be fully closed and cabinet must be locked, or drawers must be banded shut if no cabinet lock or lock bar is present.

Cabinets not equipped with pallet bases require additional caution to secure drawers prior to moving.

  1. Remove several top drawers (for gripping and tilting purposes) prior to inserting lift truck forks beneath the cabinet.
  2. Extreme caution must be used to be certain no damage is done to the underside of the cabinet with forks.
Standard powder coat finish colors are Off White, Beige, Vidmar Green, Hunter Green, Light Blue, Bright Blue, Dark Blue, Red, Medium Gray, Vidmar Gray, Warm Gray, Olive Drab Green and Black. Please visit our dynamic color tool to visualize cabinets in different colors.
Vidmar does not recommend adding wheels/casters to existing cabinets unless the cabinet has lock-in/lock-out latches.
Lock-in/lock-out latches prevent drawers from moving when fully opened or closed. Raising the latch releases the drawer. The system keeps the drawer fully opened or closed by means of a finger-activated latch. The latching system should be factory installed, since field installation will require replacement drawers. The system is best used in any type of mobile application. This might entail use as roll-around cabinets, aboard ships and planes, and in vans and service vehicles.
Cabinet Height 2" HR 3" PH 5" HR 6" PP 6" ED 6" PH 8" PN
135 28.72" 29.47" 31.97" 32.97" 32.97" 33.97" 34.97"
155 31.87" 32.62" 35.12" 36.12" 36.12" 37.12" 38.12"
175 35.02" 35.77" 38.27" 39.27" 39.27" 40.27" 41.27"
200 38.96" 39.71" 42.21" 43.21" 43.21" 44.21" 45.21"
245 46.04" 46.79" 49.29" 50.29" 50.29" 51.29" 52.29"
340 61.00" 61.75" 64.25" 65.25" 65.25" 66.25" 67.25"
No, you need to order keys directly from Vidmar. To order additional keys: Please fax the number imprinted on the key along with the shipping and billing information on your company letterhead. EMAIL: custserv3@sbdinc.com  FAX: 1-800-523-9934. We accept: MasterCard, VISA and American Express.
We offer a wide variety of locking options to help secure and protect your valuable items. To learn about our locking devices, and for installation help, view our locking instruction manual.
Yes we do! Vidmar 5S cabinets help businesses fulfill lean manufacturing processes by creating improved workflows and organizing workspaces. Click here for more information on our 5S solutions.
This patented technology, the first of its kind in industrial storage cabinets, prevents opening more than one drawer at a time. This feature prevents accidental tipping of cabinets from several drawers being opened simultaneously. The SDR feature is not intended to replace lock in/lock out latches within mobile applications (vehicular and shipboard situations). This feature must be factory installed.

Drawers may be positioned every 3/4" within cabinets. The sum total of all drawer points (20, 35, 60, 90, etc.) must equal the total height points of the cabinet, but may be arranged in any sequence within the cabinet.

Changeover process:

  1. Remove drawer by opening fully, then lifting the front of the drawer in order to clear the carriage cross member.
  2. Remove the carriage by opening fully, then lifting two release latches (one per side) on carriage to clear carriage brackets.
  3. Using a Phillips head screwdriver, remove one screw from each carriage bracket.
  4. Remove carriage brackets by lifting upward and pulling forward.
  5. Relocate brackets to desire location and reverse the above steps to install carriage and drawer.

Caution: Be certain carriage is fully engaged to brackets before installing drawer, and be certain drawer is fully engaged to carriage before use.

Vidmar cabinet drawers can be outfitted with a number of different accessories perfect for any storage needs. Choose between foam inserts, plastic bins, partitions, trays, custom tool drawers, and more.
Partitions:
  1. Remove two hex head screws (per partition) securing the partition to the drawer bottom.
  2. Lift the partition from the drawer slots, move to new location, and reinstall. Fasten with two screws.

Dividers:

  1. Remove screws (if any) to loosen dividers.
  2. Lift dividers from partition slots and move to new location.
  3. Reinstall dividers; fasten with screws (if required).
All the products are manufactured in our plant in Allentown, PA, USA.
Yes. Vidmar and LISTA are both owned by Stanley Black & Decker. Vidmar has been in the Stanley family since 1966 while LISTA, a known global leader in modular storage, was acquired in 2012. The addition of LISTA gives Stanley Black & Decker a full portfolio of storage and workspace solutions, which includes Arlink®, Nexus®, Align®, STAK, Vertical Lift Module, and more.
PDF versions of literature can be downloaded from the Literature section of our website.
To learn more about specific product and pricing information please view our product catalogs, fill out a request a quote form, browse our Quick Ship Catalog, contact us at orders@sbdinc.com or call 800-523-9462.
The Vidmar vertical weapon storage system is designed to meet the unique needs of military and law enforcement personnel. Our weapon cabinets can be custom configured to securely store any combination of guns, ammunition, accessories, and equipment. Choose from a wide selection of shelves, dividers, ammo boxes, rifle mounts, barrel cradles, and more. Learn more about our high density weapon storage systems, and weapon cradles.
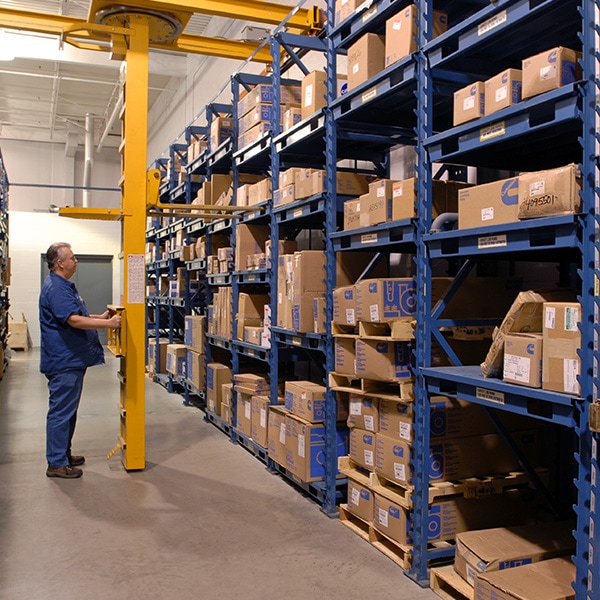
Vidmar will not knowingly quote or sell the STAK System mast and bridge for use with non-Vidmar racking and support structures. STAK System racking will not knowingly be quoted/sold without a Vidmar mast and bridge, as if intended for freestanding racking applications. STAK System racking will not knowingly be quoted/sold for used with any picking, storing, or retrieving device other than the Vidmar mast and bridge, whether or not that device mounts to or connects with the Vidmar columns.
A Yearly Preventative Maintenance Agreement is available. Please contact Customer Service at 1-800-523-9462 for detailed information.
Applications should fall within the normal ARS product parameters such as Rack Height, Pallet widths and load capacities.
All relative column protectors and end protectors are considered standard equipment and quoted/sold as part of the total order.
No, component parts for the hoist must be purchased through the hoist manufacturer.
A standard hoist can be wired to 230V or 460V 3 Phase 60 Hertz.
Vidmar workstations are custom configured to suit your individual needs. Choose different components such as the cabinet type, work surface, backstop and end stops, riser shelves and back panels, and any other accessories you would like. View our workstation guide for more information, or build a workstation today with our catalog.
  1. Empty contents from drawer. Remove side partitions (if so equipped) by lifting up from the sides.
  2. Insert screwdriver underneath slide near the front of the drawer and pry the slide away from the drawer. This will disengage the slide from the drawer body.
  3. While continuing to pry the slide away from the drawer body, lift up on the drawer body to remove the slide tab from the drawer.
  4. Repeat for the other side of the drawer.
  5. Once both tabs in the front of the drawer have been disengaged, pull the drawer straight out. Be careful to avoid dropping the drawer.

To re-installing the drawer, reverse procedure from above. Line up the tabs from the slides with the holes in the drawer body, starting with the back holes first.  Pull each slide back into place one side at a time. The final step should be dropping the drawer body onto the lances in the front and replacing the side partitions.
Please read our workstation assembly manual to learn how to quickly and efficiently assemble your Vidmar workstation and workstation accessories.
Complimentary Design Assistance
Our experts can help you design a solution that meets all your needs – free of charge.
Storage Solutions